Step-by-Step: How to Fix a Laptop Black Screen on Windows 11 and Mac
Few tech mishaps trigger an immediate spike of adrenaline quite like a sudden laptop black screen. You open your laptop lid, press the power button, or wake the device from a long slumber, only to be greeted by an empty, unyielding void. The indicator lights might be pulsing, and you can hear the faint whir of internal cooling fans, but the panel remains stubbornly dead.
Most black screen incidents are not caused by a melted graphics processor or a fried motherboard. Instead, they are typically the result of a confused operating system, a stalled display driver, or a simple misnegotiation of power between the system firmware and the backlight.
Instead of panic-searching for a local repair technician, you can isolate and fix the issue yourself. This sequential troubleshooting guide will walk you through the diagnostic process step-by-step, moving from the simplest soft resets to deeper system recovery techniques.
Step 1: Rule Out the Basics (The 30-Second Audits)
Before executing advanced recovery processes, you must eliminate minor external glitches that mirror a dead system.
- Check the Brightness Level: Tap your keyboard’s physical brightness keys continuously to ensure the display hasn’t simply been dialed down to zero percent. On a Mac, use the F2 key; on Windows, use your manufacturer-specific brightness key (you may need to hold the Fn key while doing this).
- Disconnect All Peripherals: Unplug every external device attached to your laptop—USB hubs, external hard drives, printers, and even second monitors. A rogue peripheral or a shorted cable can freeze the boot sequence at a completely blank screen.
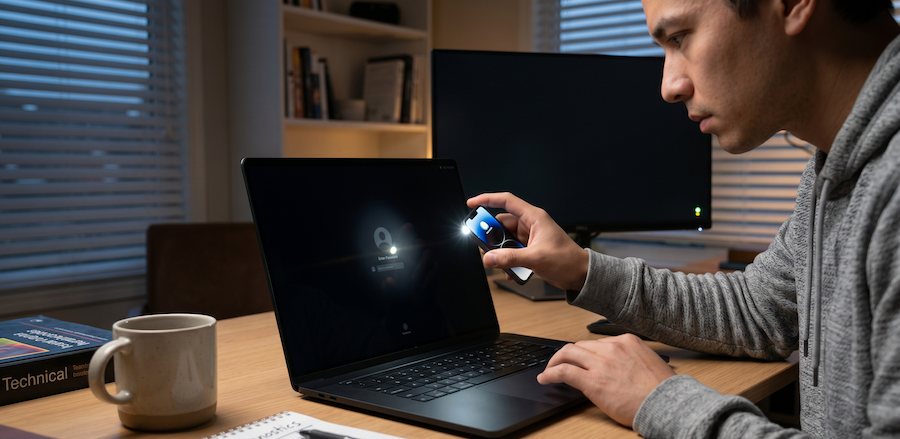
- Perform a Flashlight Test: Bring your laptop into a dark room and shine your smartphone’s flashlight closely at the center of the dark glass. If you can faintly see the outline of your desktop or login screen, your computer is fully awake—your physical screen backlight has simply failed or stalled. If it’s completely blank, move to Step 2.
Step 2: Force a Graphics Reset
If your operating system is running but the pipeline to your display adapter has frozen, you can force a refresh without losing your unsaved work.
- For Windows 11: Press Windows Key + Ctrl + Shift + B simultaneously. Your laptop should emit a brief, clean beep, and the screen will flicker for a split second as the display driver purges its cache and restarts.
- For Mac: Quickly press the Power/Touch ID button once (or close the lid for 15 seconds, then reopen it). This forces the system to trigger a low-level sleep state, forcing the graphics engine to re-handshake with the display panel upon wake.
Step 3: Revive the User Interface (Black Screen with Cursor)
If your screen is dark but you can see and move your white mouse cursor freely, your hardware is perfectly healthy. The foundational graphical user interface shell has simply crashed in the background.
If you are on Windows 11:
1.Open the Security Interface:Keyboard Shortcut.
Press Ctrl + Shift + Esc on your keyboard to launch the Task Manager directly. If that fails to open, press Ctrl + Alt + Delete and select Task Manager from the blue security screen.
2.Initialize a New Task:System Console Access.
Look at the top-left corner of the Task Manager window. Click on File, then select Run new task from the drop-down menu.
3.Rebuild the Shell:Command Execution.
In the blank dialog box that appears, type exactly explorer.exe and press Enter. Within a split second, your taskbar, desktop icons, and active windows should instantly snap back into view.
If you are on Mac:
- Press Command + Option + Escape blindly to see if the Force Quit Applications menu appears.
- If the cursor is moving but the window doesn’t appear, press Command + Spacebar to see if the Spotlight search bar tracks your cursor movement.
- If the UI remains completely frozen except for the cursor, press Control + Command + Power Button to force a graceful restart of the Finder shell subsystem.
Step 4: Isolate the Panel Using an External Screen
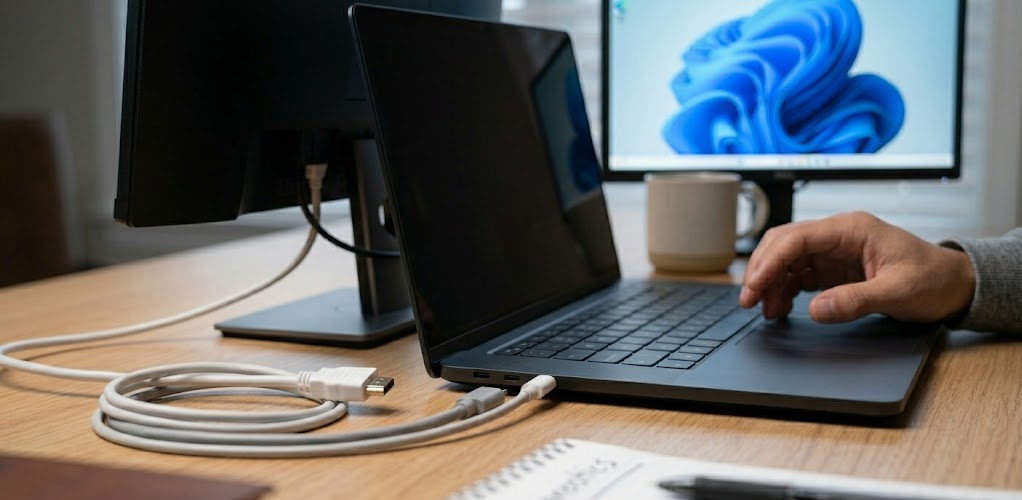
If the shortcuts yield no results, you need to determine if the issue lies with the laptop’s brain or its internal display panel.
- Connect your laptop to an external desktop monitor or television using an HDMI or USB-C display cable.
- Turn the external monitor on and ensure it is set to the correct input channel.
- For Windows users: If the secondary screen remains blank, press Win + P blindly, tap the down arrow key twice, and press Enter to force the system to mirror its output.
- For Mac users: Modern MacBooks will automatically mirror to an external display if the internal lid is slightly closed or if you press Command + F1 (or Command + Brightness Down on newer layouts).
- Analyze the result: If the external monitor displays your desktop perfectly, your computer’s core hardware is fine. The issue is likely a loose internal display ribbon cable or a failed built-in LCD panel.
Step 5: Force a Power Cycle and Discharge Static
Residual electrical charge trapped in the motherboard’s capacitors can trick the system into a non-responsive sleep state. A hard power drain forces the firmware to reload from scratch.
- For Windows Laptops: Press and hold the physical power button down firmly for a full 20 seconds. Release it, wait 10 seconds, plug your charging brick directly into a wall outlet, and tap the power button once to turn it back on.
- For MacBooks (Apple Silicon – M1, M2, M3, etc.): Shut down the machine. Press and hold the power/Touch ID sensor for a full 10 seconds until you see the system boot options screen appearing on the display.
- For Older MacBooks (Intel): Shut down, then hold Option + Command + P + R simultaneously for 20 seconds to completely flush the NVRAM/PRAM preferences, which manage deep-level display layouts.
Also: How to Fix Black Screen Issues in Windows 11
Step 6: Boot into Diagnostic Safe Mode
If your black screen occurs immediately after an operating system update or a manual graphics driver change, an incompatible software layer is crashing before the desktop can load. You must bypass these files using Safe Mode.
If you are on Windows 11:
- Turn on your laptop. The moment the manufacturer logo appears on the screen, press and hold the physical power button to force a shutdown.
- Repeat this abrupt interruption three times consecutively. On the fourth boot, Windows will detect the failure loop and launch the Windows Recovery Environment (WinRE).
- From the blue menu layout, navigate sequentially to: Troubleshoot > Advanced Options > Startup Settings and click Restart.
- Upon rebooting, tap the 4 or F4 key to launch your system in Safe Mode. Once at your desktop, right-click the Start menu, select Device Manager, expand Display adapters, right-click your graphics card, select Properties, and click Roll Back Driver.
If you are on Mac:
- Apple Silicon Macs: Turn off your Mac. Press and hold the power button until “Loading startup options” appears. Select your startup disk, then press and hold the Shift key and click Continue in Safe Mode.
- Intel Macs: Turn on or restart your Mac, then immediately press and hold the Shift key until you see the login window.
- Note for Mac users: Once booted into Safe Mode, macOS automatically runs a directory check of your startup volume and clears out system-level display caches. Simply restarting your Mac normally right after this will often fix the black screen loop.
The Road Ahead
As modern operating systems become more resilient, absolute display failures are increasingly software-driven rather than fatal hardware breakages. By executing standard keyboard reset overrides, using an external monitor to narrow down the failure point, and knowing how to access the underlying recovery ecosystem for both Windows and macOS, you can safely demystify the dark screen and fix your device right at home.