How To Correct Blurry Images On iPhone
Nowadays, it’s not as difficult as it once was to improve blurry or low-quality pictures, especially on an iPhone. Thanks to photo editing software and tools that rely on artificial intelligence, you have a greater chance of success. As technology continues to advance, the quality of these tools will only improve, making it even easier to enhance your photos.
Use the Sharpening Tool in your Photo Editor
The easiest way to improve a blurry photo is to open your favorite photo editor and use its sharpening tool. However, this solution has limitations and is most effective for photos that need a little more clarity, rather than those with severe autofocus issues. The sharpening tool can only enhance existing edges and won’t do much for areas that are out of focus or blurred due to motion. When it comes to motion blur, the sharpening tool can actually make the blur more noticeable by highlighting the trails caused by the camera’s slow shutter speed.
There is no specific tool you should use to sharpen a photo since most photo editors have a sharpening slider that you can adjust. It’s important to be careful not to overdo it, as too much sharpening can make the photo look too artificial. Some photo editors have other sliders that you can use to enhance the photo’s definition, such as “Clarity” in Adobe products and “Definition” in Apple’s editors.
Also: Turn Your iPhone Into a Security Camera
If you took the photo with your smartphone, you can use the editing tools available in your device’s photo editor. Apps like VSCO and Snapseed offer free tools for this purpose, and you can also use the editing tools in stock apps like Apple Photos or open-source alternatives like GIMP.
Use Dedicated Tools to Repair Blurry Photos
If your photo is seriously blurry, you can try using artificial intelligence (AI) to fix it. However, the success of this method depends on whether the AI can correctly identify the subjects in the photo and make the necessary enhancements. The results may vary, so you might need to try a few different tools until you find one that works for you.

One challenge with using AI is that it may not always understand which parts of the image you intentionally blurred and which parts you want to sharpen. This can be especially tricky if your subject is out of focus and you want to preserve a soft background with a depth-of-field effect.
Unfortunately, most of these AI tools are not free. They either require credits or a subscription fee, except for one tool that you can buy outright. Here are some of the best options we found.
1. Fotor
Fotor is a photo editor you can use on a website, and it has a free trial. The best part is that you can try it out first to see what kind of results it can give you. Out of all the free web-based options we looked at, Fotor did the best job. To use Fotor, sign up for free and then upload a photo. Click on the “AI Enlarger” tool.
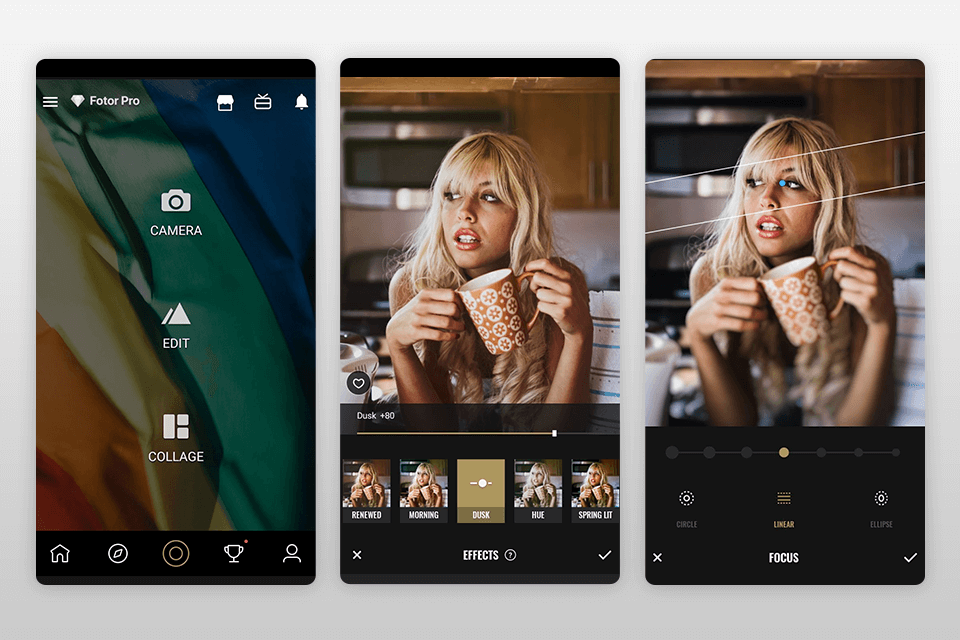
You can then move the line in the middle of the screen to compare the original and the improved version. Fotor was able to enhance some of the fur in our blurry cat photo, but it had more trouble fixing the motion blur in our moving train photo.
Fotor really wants you to try its Pro trial, which you have to sign up for to export anything. If you don’t pay, your images will have a watermark on them. You can sign up to their packages to get access to all of Fotor’s features and get rid of the watermark.
2. Topaz Sharpen AI
Topaz Sharpen AI is the most costly tool on the list. However, it’s the most remarkable tool that provides the best outcomes. It works on both Windows and Mac computers, and it requires more than 2GB for the initial download and 500MB of model data to be downloaded on the first run.

Sharpen AI analyzes your photo and selects a profile to remove blur. You can place your photo in a category that you think best describes it, then use sliders to fine-tune the effect. The results are impressive. Sharpen AI is the only tool that meaningfully reduces motion blur in our moving train photo.
Sharpen AI also does an excellent job of adding definition to the hair in our blurry cat photo and removing some of the motion blur in other parts of the picture. You can keep using Sharpen AI to enhance photos and even save them with a watermark until you’re ready to buy. The app works well on our M1 Max MacBook Pro, but its performance may differ depending on your computer.
3. VanceAI
VanceAI is a web-based tool like Fotor, where you can upload a photo and let the app process it without signing up or logging in. The app has options for different types of images such as blurry artwork, text, or low-resolution images from the web. You can also choose how much you want to enlarge the image, and adjust the sliders to reduce noise and blur.

In our tests, VanceAI’s effect was subtle, making slight improvements to our blurry cat photo but not much difference to the out-of-focus areas. The motion blur in our moving train picture remained the same. VanceAI might be more useful for heavily pixellated images or other types of images, so it’s worth trying out. You can use a few photos for free, and then make a purchase for more.
4. Adobe Photoshop
The most famous photo editing software, Adobe Photoshop, has a filter called Shake Reduction that can be handy to fix blurry photos caused by camera shake. The filter is located in the Filter > Sharpen menu, but it is not available in the latest version (23.3.1). You can still access it by installing an older version (22.5.7) along with the latest one.
With Smart Sharpen tool, you can also add more detail to a blurry photo. Photoshop has many other features, including a RAW editor, stitching tools, filters, and masking tools.
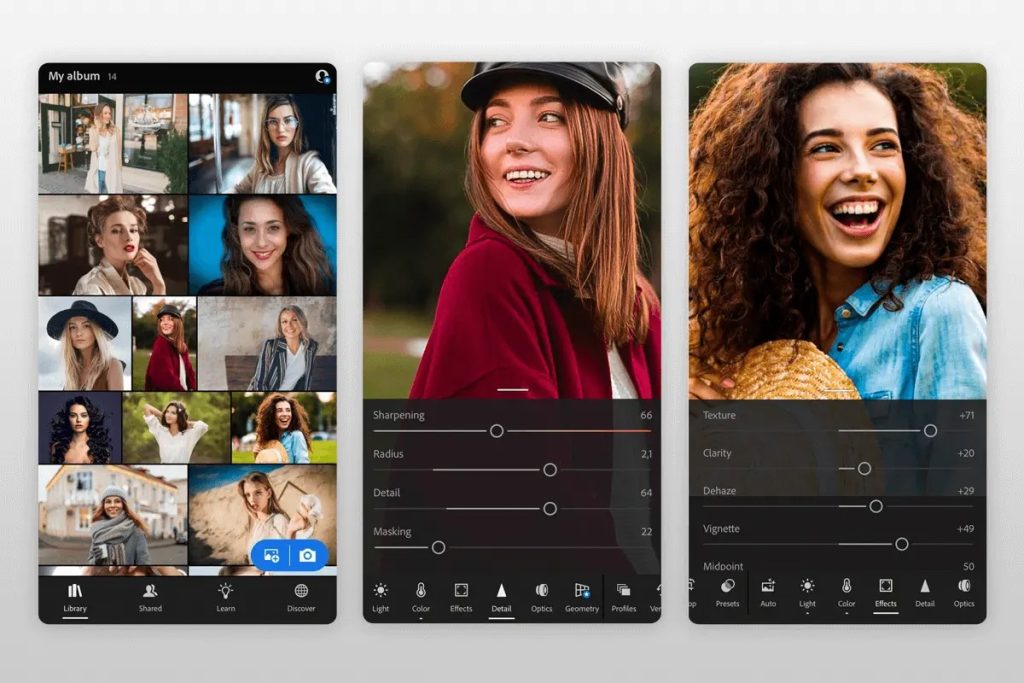
Although Photoshop is a useful tool, it is the most expensive tool on this list. With a low cost subscription per month, you get 1TB of storage in Adobe Creative Cloud, along with access to Adobe Lightroom. You cannot buy Photoshop outright, and yearly payments do not provide a discount. However, you can try it for free for seven days.
Live Photo or Motion Photo? Pick Another Frame
If your photo is a Live Photo captured on an iPhone or a Motion Photo captured on a Samsung device, there may be a way to recover the image by selecting a different frame that was taken at the same time. But, to do this, you must have taken the photo with this function turned on initially.
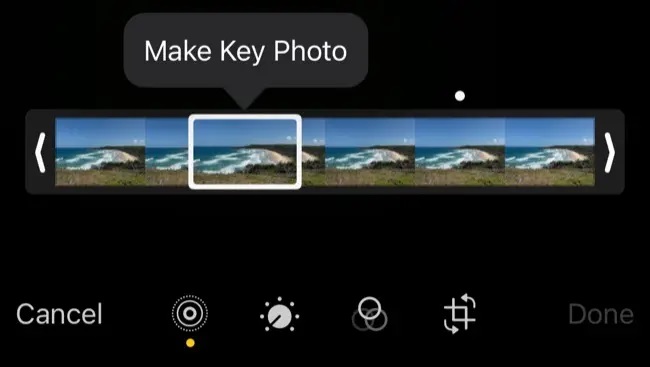
For an iPhone, go to the Photos app, find the photo, and tap “Edit” in the top-right corner. Then tap on the “Live Photo” button that appears at the bottom (it looks like three circles). You can now swipe left and right to view all of the images taken as part of the Live Photo. Pick a clear one, then tap “Make Key Photo” to select it.
When you export the photo (with or without Live Photos enabled), the chosen frame will be exported instead of the blurry original.
On a Samsung device, the process is similar. While viewing a Motion Photo, tap “View Motion Photo” at the bottom. Use the slider to select a frame, then tap “Capture” on the bottom-left to save it as a new photo.
Avoiding Blurry Photos
Avoiding mistakes that cause blurry photos is the best way to fix them. It can be difficult to do this, particularly if you rely on smartphones to take pictures on full auto. These devices can make mistakes by choosing the wrong course of action.
However, there are a few things you can do to enhance the quality of your photos.
1. Fix Your Focus
To avoid blurry photos, you can try manually focusing your camera or smartphone before taking a picture. This is especially useful when you want to control the focus of the shot or if the camera’s automatic focus is unreliable.
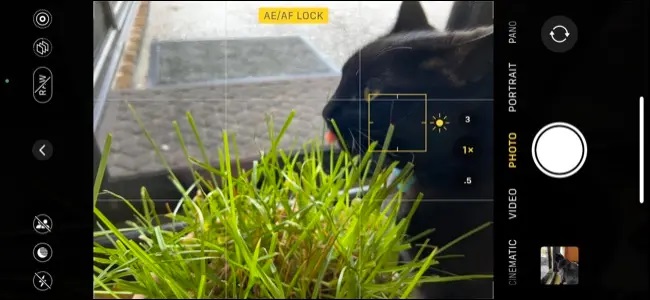
On a smartphone, you can tap and hold the subject to set the focus. Many cameras also have touchscreens that allow touch-to-focus modes, and some cameras with interchangeable lenses let you disable autofocus and use the lens barrel to focus instead.
In situations with low light or fast-moving subjects, manual focus can help you capture a better shot. For instance, when taking pictures of a concert with flashing lights or a lightning storm, the camera’s autofocus may not be able to focus on the subject correctly.
2. Night Mode and Low Light
Many smartphones have a night mode that uses AI to combine multiple exposures into one image. It’s great for still subjects like the night sky or a quiet street, but not good for moving objects like people or animals. To turn off night mode, you can usually tap a button on your camera interface. Apple and most Android smartphone manufacturers have this feature.
When you turn off night mode, your camera will increase the shutter speed to compensate for the lack of light. The longer the shutter speed, the more light will enter the shot. However, longer shutter speeds can also lead to blurry photos if there’s any movement.

To improve your photos, you can change the position of your subject to use better lighting, or ask them to stay still. If you want to capture a moving subject like a car or someone running, try panning with them to get a shot with motion blur around the edges of the frame.
If those techniques don’t work, you can use your smartphone’s flash, but be aware that the harsh light from the flash can be unflattering.
3. Use a Tripod, Monopod, or Image Stabilization
To take a clear shot, you can use a tripod to keep your smartphone or camera steady. This allows you to use a slower shutter speed to capture more light without any camera movement. You can also use the timer function on your device to avoid any movement when pressing the shutter button.
Some cameras have a built-in image stabilization feature, which helps to compensate for any small movements when holding the camera. This feature is commonly found in modern digital SLR or mirrorless cameras and is known as “Optical Steady Shot” on Sony cameras. This technology enables you to shoot handheld with slower shutter speeds of around 1/10 of a second without getting blurry photos.
Taking Better Photos
If you want to take better pictures with your smartphone, there are some tips you can follow, such as using light effectively and using a tripod for more stable shots. However, if you’re still unhappy with your smartphone photos, you might want to consider buying a dedicated camera. These cameras can offer better performance in low-light situations, more control over settings, and the ability to switch between different lenses with varying focal lengths and apertures.



iPhones are great for taking photos. That’s a simple fact that android users need to understand.